Showing posts with label patterns. Show all posts

Monday, July 1, 2024

How to Crochet a Water Bottle Carrier

About a year ago, I made three videos. The idea was to edit them into something coherent and then post them to YouTube.

The first video is finally ready. (I sent them to my brother who knows how to edit video. He kindly did the edits for me. It took me forever to watch and ask for fixes. And then to watch again to make sure it's ready to be posted.)

It's a how to make this thing:

I wrote out the pattern about decade ago and posted it to this blog. But last summer I had this idea of making it on camera. So, I did. 

And here's the resulting video:

It's about a half hour long. 

Hopefully I'll get the next two uploaded sometime this summer. That's the goal, anyway.

Monday, February 28, 2022

Button Band for Masks

A few weeks back I posted pics of my little button bands that I made to hold my mask so I don't have to put the elastic over my ears. (After one day of that, I knew I needed a work around.) 

No, I haven't made any more lately. But, in case I ever want to make some more, I find it's a good idea to write down what I did so I can replicate it. I have found that posting these patterns on the blog makes it way easier for me to find later than writing it down on a piece of paper. I mean, I have knitting binders and such, but finding anything in them... 

For this pattern, you need a bit of yarn. I didn't measure how much, but it was a scrap, basically. All of the materials I already had lying around, so this is not the sort of thing you need to go out and buy for. But for completeness sake, I'll write this out.

Materials:

  • Length of worsted weight yarn (cotton seems to work well, but my first attempts were acrylic)
  • Size 8 (5.0mm) needles
  • 2 shank style buttons
  • 4 inch length of 20 gauge wire (folded in half)
  • Scissors
  • Tapestry needle

The main trick to this is to knit the buttons onto the piece. While sewing the buttons on works just fine, there's the extra ends to weave in, and I wanted to save a couple steps. 

How to attach the buttons:

Knit to the spot where the button is to be attached. 

Remove the next 2 stitches from the left needle. Slip both stitches onto the wire. 

Then thread through the button shank. 

Once through, remove both stitches from the wire and place back onto the left needle. (This can be a bit fiddly, so putting both stitches back onto a smaller needle may work more easily.) 

Then knit each stitch individually.

Pattern:

Cast on 17 stitches.

This is worked in garter stitch (knit every row).

Knit 3 rows.

On the 4th row: Knit 2 stitches, attach button over the next 2 stitches, knit to the last 4 stitches (knit next 9 stitches), attach button over the next 2 stitches, knit 2.

Then knit 3 more rows.

Bind off.

And that's it. Wind in the ends from the cast on row and the bind off row, and it's complete. 

It took me less than an hour to make one this way. It was well worth the effort to save my ears.

Saturday, June 13, 2020

Crocheted Lip Balm Clips

A long time ago, I set about making a clip to attach my lip balm to a belt loop. I can't recall if it was due to a lack of pockets or if I was looking to attach it to my work lanyard. 


In the end, I did manage to come up with one, and since then I have made dozens of them. (I wish that was an exaggeration. I've probably made a couple hundred at this point.) 


Of course I have made many for sale. They can be found at my Etsy shop, Zizi Rho Designs, under the section Stick Lip Balm Cozies


But if you'd rather make one yourself, the instructions follow: 

This holder is crocheted using Caron Simply Soft Yarn on a size G hook. The other things you'll need are a 23 mm lobster claw clasp (adjust size if using a different weight of yarn), a tapestry needle, and a stitch marker. I'm not sure how much yarn this takes to make, but it isn't much at all, so I'd suggest you go into your stash for the yarn rather than buying new.

I'm using the usual abbreviations--sc=single crochet; sl st=slip stitch; ch=chain

Gauge: 17 sc and 18 rows over 4 inches
This is one of those projects that is so small that making a gauge swatch is kind of silly. What I suggest is that you keep your lip balm on hand and try it out. If it won't fit, add a stitch to the first round. If it's very loose (there should be a little ease, but not so much that it'll fall out), subtract a stitch from the first round.  

This is worked in a spiral, so make sure to mark the beginning of each round as you pass it. It's very easy to lose track if you don't mark it. (Not that I have any experience with that...) 

The Pattern:


Ch 3. Sl st into the first chain, making a loop.
Round 1: Work 9 sc into the ch 3 loop. 
Rounds 2-9: Work 1 sc into each stitch around. 
Round 10: Work the same as for rounds 2-9, except at stitch 2 (or any preferred stitch): 

Take the hook out of the loop, pull the loop to make it bigger, and slide the clasp (open part facing down) over the whole stitch. Then replace the hook in the loop, tighten the loop back on the hook (with the clasp tight against the previous stitch, and continue to work 1 sc into each stitch around. 

Round 11: Work the same as for rounds 2-9. At the stitch that the clasp is attached to, push the clasp out of the way, and work 1 sc into that stitch. 

Finishing: Cut yarn. Draw the yarn all the way through the loop. Then put that yarn on the tapestry needle, and loop the yarn around the base of the next sc and up and through the top of the final sc. If you've never done this before, here's a great video showing exactly what I'm talking about (if it doesn't work, try searching "crochet seamless join in the round"):


Wind in ends. The lip balm should fit snugly inside, but not so snugly it's hard to get into the cozy.

Wednesday, June 26, 2019

A Quick Project


It was my fourth (and last) day in Mr. G's class. Being summer school, they had individual work (that they weren't doing, mostly), so I had a lot of time to sit and watch them.

I had read my Entertainment Weekly, written three (well, this one too, so four) blog posts, and beta read thirteen chapters of a fellow blogger's book. I had also taken roll, kept track of all the classes, and made sure the classes' assignments kept up with what they should have been able to finish.

I needed something else to do.

I had recently (April-ish) replaced my school bag. I decided my IKEA clock needed a cozy.

Let me back up a minute. I carry a small clock for days when the classroom has no working clock. My new school bag doesn't have a great spot to stash it. So, I figured I could knit it a clipped pouch to make it easier to access in the bag.


And since I needed something to do while watching kiddos not work...

I started the gauge swatch. I measured it and the clock. I figured out how many stitches to cast on. And then I started it and knit almost half of it. In the first two-hour block of the day.

In the second two-hour block, I finished it with almost an hour to spare. That includes binding off and winding in ends. (And, of course, that includes starting class, taking roll, giving them their assignment for the day, and keeping watch over them.)


There were some obvious mistakes in my knitting. I had made a brief mental plan of what I wanted to do, but things got changed in the knitting, as they always do. I lost a stitch somewhere (I'm pretty sure I know where). I put the "button hole" in an awkward spot (making it diagonal). It is a little bigger than I needed.

But, I figured I could write up the pattern. If I ever decide to redo this, I have ready access. I edited out my most obvious mistakes in the write up. It is knitable, and it does the job.

Small Clock Clipped Cozy Knitting Pattern


Materials: 
Yarn: Caron Simply Soft (in olive green)--no where near a full skein, so use scrap yarn for this

Needles: US size #7 (4.5mm) dpn, set of four 

Notions: Name badge clip, marker

Gauge:
20sts/4 inches over stockinette stitch 

Directions:
CO 36 sts, join to work in the round (careful not to twist)
  • Round 1: (K1, p1), repeat 8 more times, (p1, k1) repeat 8 more times
  • Round 2: (P1, k1) repeat 8 more times, (k1, p1) repeat 8 more times
  • Round 3: (P1, k1) repeat 7 more times, bind off the next 4 sts, (k1, p1) repeat 7 more times
  • Round 4: (K1, p1) repeat 7 more times, cast on four stitches, (p1, k1), repeat 7 more times
Begin working in stockinette stitch (knit every round). Continue until piece measures as long as desired (to length of clock). 

Then, arrange sts evenly over two needles (18 sts per needle). Turn inside out. Bind off using the 3-needle bind off.


Wind in ends. Snap name badge clip through button hole made over rounds 3 & 4.

Monday, July 30, 2018

For Pretty: A Water Bottle Cover Pattern

Back in January, I previewed the water bottle cover I'd made.


What I didn't mention was that I had submitted the pattern to a publication in hopes they would publish. Alas, they passed. But, they gave me an interesting note. They said that the pattern would have been better if it had been more of a formula so that anyone could cover any size bottle.

Well, that's something I can work with.

I sat with the idea for a while. How could I come up with such a formula? I knew what I had done to figure out how to make my knitting fit my water bottle. How could I put that in pattern form?

This is why I'm only putting this pattern out now, in July, when it was initially completed before January.

The solution I came up with was to create a worksheet-style addition. And by self-publishing a PDF, I could make the pattern as long as needed. (Publications have space considerations.)

The pattern is now in three parts. Part one contains the basics of construction. Part two has the instructions on how to complete the math to figure out how many stitches are needed. And part three is a fill-in-the-blank worksheet where the math can be done. Oh, and then there's the stitch pattern and such.

Whichever parts someone needs can be printed out, and the unneeded sections can be ignored.

I think it's a rather elegant solution. But time will tell if I'm alone in that opinion.

I created a Pinterest-type photo to make pinning the link easier...


Here are the links on where the pattern can be purchased:

Monday, December 11, 2017

Mini Santa Hat Headband

As of "press time" I had not completed the project with the wire covered in knitting (crochet?). I got sidetracked...


It's a mini Santa hat on a headband!

I saw a kiddo wearing one a year (two years?) ago, and it's been sitting on my "knitting to-do list" since then. I noticed it the other day, and I realized I had all the pieces I needed. I repurposed the white headband I'd already made (the kitty ears came off easily), and I found a mini Santa hat pattern on Pinterest.

Et voila!


In case any knitters want to take a stab at this, I'm including all the links you'll need:

The headband pattern I posted this past February.

The mini Santa hat pattern is here. I used Caron's Simply Soft yarn (I had this on hand already) on size 6 double pointed needles. (I ended up with a gauge of 6 sts per inch.) My hat ended up bigger than the pattern intended, but it was about the size I wanted.

I can't find the link for the "poof" on the tip of the top. I used Lion Brand Fun Fur and made a knitted bead. (If I can track down the pattern I used, I'll edit this post and include the link.) However, the hat pattern has a "pom pom" part, or you can improvise something different.

Assembly:

Once the headband and hat were complete, I put a little fiberfill into the hat (just enough to fill the bottom half lightly), and I grafted the hat to the headband using white yarn. (It was the same yarn I used for both the brim of the hat and the cover of the headband.)

Then I folded the hat so it had that jaunty angle, and I tacked the top to the middle.

This thing is too much fun. If you make one, would you please tag me if you post it to Instagram, Twitter, or Ravelry? I'm @ZiziRho. I would love to see other people's interpretations of these.

Monday, October 30, 2017

Fidget Spinner Cozy Pattern

I've been meaning to post this for a while. I wrote this up in May, I think, and then set it aside and forgot about it. Oops.


(I know many of my readers aren't knitters. If you want one of these but don't have the means to make it yourself, I am selling them out of my Etsy shop, Zizi Rho Designs.)

Initially, the idea was to repurpose my "knitted pouches" (which is a repurpose from a cell phone cozy that you can clip on something--long story how they came about in the first place). If the fidget spinners fit inside, that's what I'd call the pouches from now on.

But once I had that thought, I kept going. I could knit something the same size as the fidget spinner. It would need to be a triangle. but if I did that, then I could keep it open at the center so one could still spin it while it was in the fabric. This would make it a cozy...


How to construct? I could start from the center, knit one side, then knit the other. That way, both sides look exactly the same. Balanced.

So, plan in place, I set about knitting one. I used a temporary cast on. Knit a few rounds. Bound off. Unraveled the temporary cast on and repeated for the other side. Easy enough.

But I didn't like how the finished object looked. There was an extra half row that made the garter ridges look wrong.

A couple more tries with a couple more tweaks...

And I discovered that I was making the whole thing much more complicated than I needed to.

I guess I've been knitting for too long. I know several ways to accomplish a goal. I was using every trick I know when simpler is actually best in this case.


Right. So that's the story. Here's the pattern.

Materials:
  • About 0.15 oz of worsted weight yarn
  • Set of 4 size 8 (5.0 mm) double pointed needles
  • Stitch markers
Gauge: About 15 sts/4 inches over garter stitch while slightly stretched.

This is made to fit the triangular shaped fidget spinner that's about 3 inches (7.6 cm) along each side. If you have a different style to cover, adjust the pattern accordingly.

Notes:
  • This pattern is written to be knitted on 3 double pointed needles. If using a different circular method, mark each "needle" with stitch markers and proceed accordingly. 
  • The increases are done by doing a yarn over (yo) on the round, and then on the following round working those yarn overs through the back loop (TBL)

Using Old Norwegian Cast On, cast on 21 stitches.
Arrange these stitches over 3 needles, 7 stitches per needle (or mark off 7 stitches).
Join to work in rounds.
Follow the chart, working each needle as indicated:

Round
Needle 1
Needle 2
Needle 3
1
K1, yo, k6, yo
P1, yo, p6, yo
K1, yo, k6, yo
2
P1, p1 TBL, p6, p1 TBL
K1, k1 TBL, k6, k1 TBL
P1, p1 TBL, p6, p1 TBL
3
K1, yo, k8, yo
P1, yo, p8, yo
K1, yo, k8, yo
4
P1, p1 TBL, p8, p1 TBL
K1, k1 TBL, k8, k1 TBL
P1, p1 TBL, p8, p1 TBL
5
K11
P11
K11
6
P11
K11
P11
7
Ssk, k7, k2tog
P2tog, p7, p2tog
Ssk, k7, k2tog
8
P9
K9
P9
9
Ssk, k5, k2tog
P2tog, p5, p2tog
Ssk, k5, k2tog
10
P7 (bind off)
K7 (bind off)
P7 (bind off)

Round 10 is the bind off round. Use the Simple Stretchy Bind Off.


Wind in ends, and put it on your fidget spinner.

I'd love to see your finished projects. Upload to Ravelry. Tag me on Instagram or Twitter (I'm @ZiziRho).

Monday, September 18, 2017

Bullseye Beanie Pattern Now Available

I finally finished writing up the pattern for the Bullseye Beanie (thanks for the name, Alex :)

Bullseye Beanie, modeled by middle nephew
If you're interested in knitting it, you can find the pattern on Ravelry (link) or Etsy (link).

Why did it take me so long to write up the pattern? Because I had a time trying to figure out how to explain a few things. While this is a basic beanie in shape, there are a few considerations that come with getting it to look just right.
  1. Because it was supposed to look like a target, I didn't want lined up increases to mar the look at the top. (Usually increases are stacked to create a swirl pattern. Which can be cute. But not what I wanted.) But how could I explain what I did? It made sense in my head and on the needles, but how do I convey that in print?
  2. How do I explain how not to get a jog at the color change? (It's something that happens when knitting in the round.) 
  3. Do I write the pattern assuming that the knitter who wants it knows all the ins and outs of working a pattern like this? 
In the end, I found videos on YouTube of all the techniques I used. It was easier than trying to explain what I did. 

It's amazing what you can find demonstrated on YouTube.

Monday, August 21, 2017

Key-per


I finally sat down and wrote out the pattern for the keychains. It takes me a while as I want to make sure I get it down as accurately as I can. So, I take my time, go back and reread, and go back and edit. (And hope that I caught all the errors.)

I'm doing something slightly different this time, though. The basic pattern is right here on the blog, and it will stay right here on the blog. But, I've also created a PDF for this that contains a few more pictures (illustrations of adding the beads and such), and that is available for sale on Etsy and Ravelry. (Click on the links to purchase from your preferred site.)

(This is something that One Dog Woof does with all her patterns, so I thought I'd give it a try.) If you'd like to support my designing efforts, or if you'd prefer a clean copy of the pattern that you can print out, I'd appreciate you purchasing the PDF download. (The PDF is eight pages long.)


Materials

  • Yarn used: Patons Metallic [63% nylon, 28% acrylic, 9% wool; 197 yds/180 m skein]; Colors shown: Metallic Orange, Burnished Rose Gold, Purple Rain, Black Marble (not a lot required—about 10 yds total)
  • 1 set of 2 US #8/5mm double-point needles (dpn)
  • 0.39-inch eyelets/grommets
  • Split ring key ring 
  • Tapestry needle
  • Crochet hook size G/4mm (optional)
  • Beads (optional)
  • Short length of 20 gauge wire bent in half (only if doing the beading) 
  • Split ring marker (optional)

Pattern Notes

I-cord: To make an I-cord, cast on a small number of stitches (for this project, it’s 4) on a dpn

Do not turn. With right side facing, slide stitches to other side of dpn. Knit them.

Repeat for desired length.

I-cord video tutorial or written tutorial

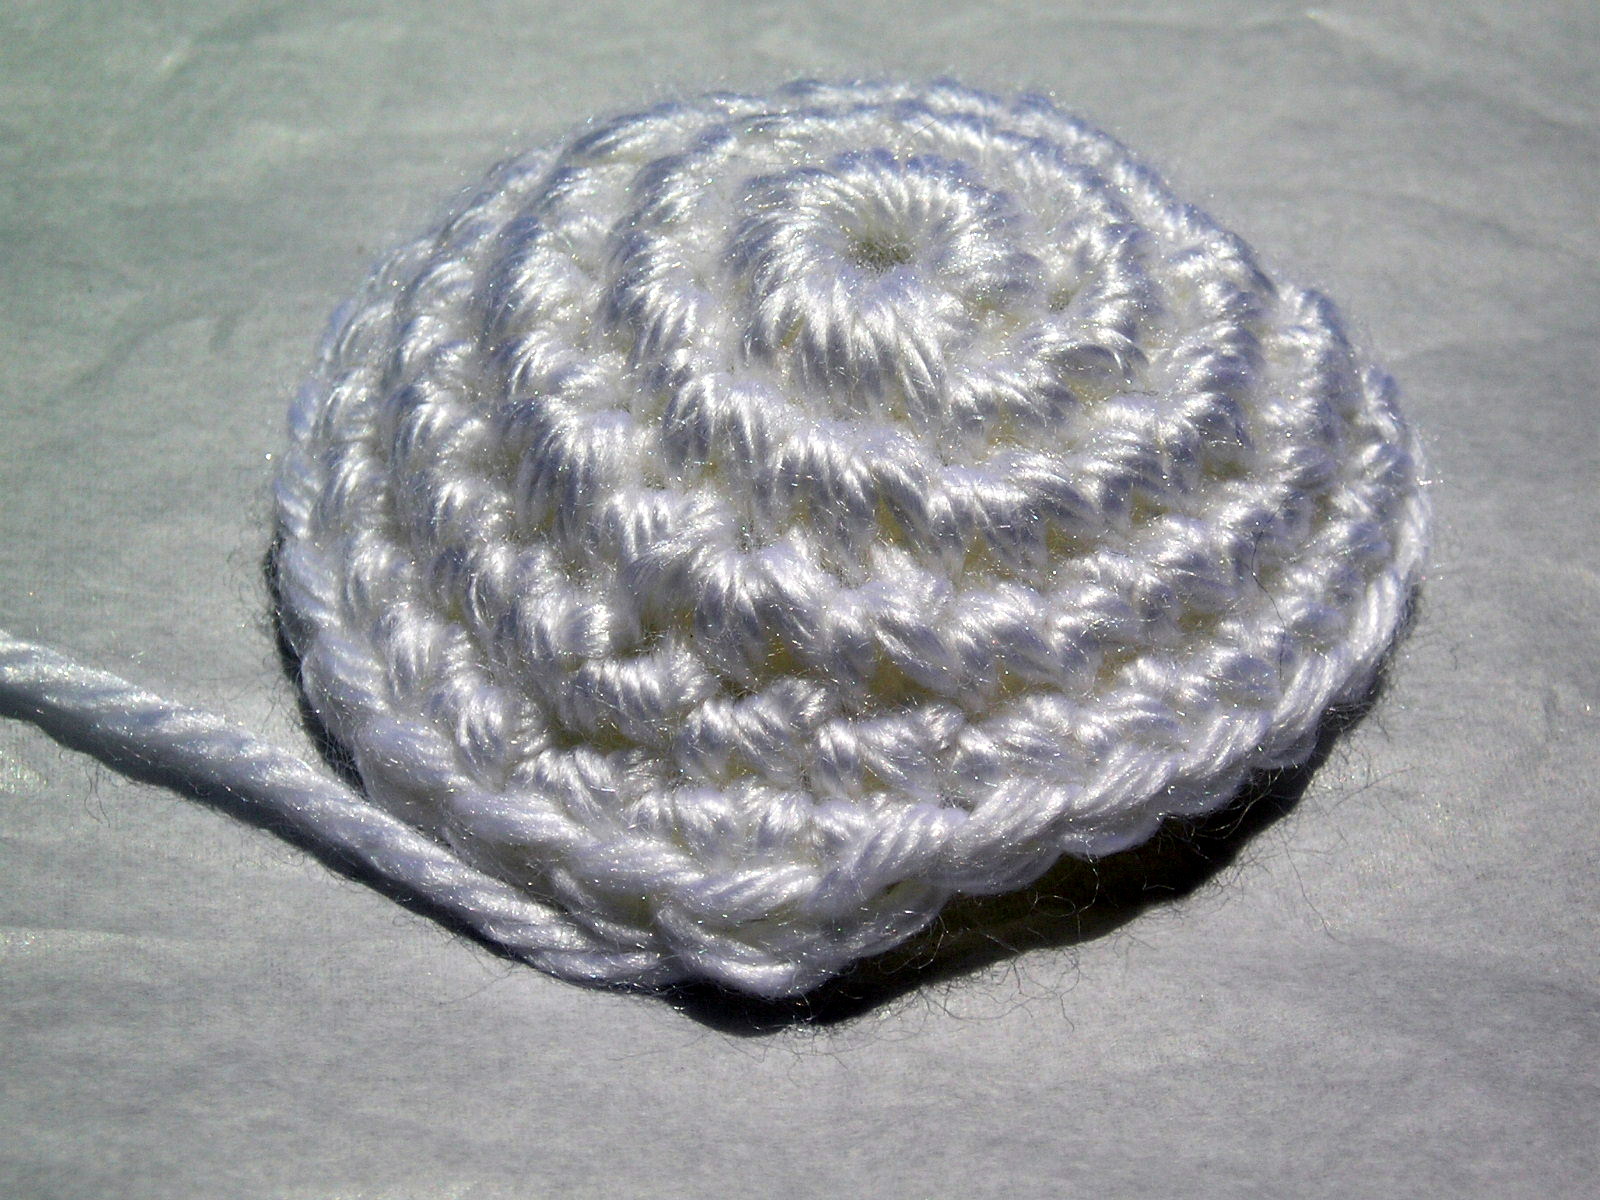
Crab Stitch: The edging shown is done using this crochet stitch. It is optional. (It can just as easily be sewn shut.)

A video tutorial or a written tutorial

Placing grommet: The recommended size grommet is used in the pictures, but a smaller or larger grommet can be used.

Take the two pieces of the grommet. Line up the holes in the key fob. (They may not entirely line up. It’s okay to fudge this part a bit.) Slip the grommet through. Then press down. (There is no need to buy the press just to make one of these. They also sell grommets with a small piece that you can use to hammer this together.)

Beading: Beads can be placed anywhere you wish on this project, or can be left off entirely. Select beads that will easily slip over the yarn. If you wish the beads to be on the outside of the piece, keep them on the 2nd and/or 3rd stitches of the I-cord.

To place beads:

Knit to 1 stitch before the stitch you want to place the bead on. Slip those stitches to the split stitch marker. (This is optional. However, the recommended yarn is a bit slippery, and holding two needles with so few stitches on them is a bit awkward.) Then slip the next stitch onto the wire. Slip the bead over the wire and pull down over the stitch.

Return this stitch to the needle. Return the held stitch(es) to the needle. Slip the stitch with the bead, and continue in knit to the end of the round.


Pattern

Cast on 4 stitches. Turn.

Row 1: Purl 4, turn
Row 2: Knit 2, yarn over, knit 2, turn

Note: At this point, you may wish to slip the first stitch of every row. This will make it slightly easier at the finish to attach the beginning of the loop to the end.

Row 3: Purl 5, turn
Row 4: Knit 2, knit 2 together, knit 1, turn
Row 5: Purl 4, turn
Row 6: Knit 4. Do not turn.

Now, slide the stitches back to the right side of the needle and continue as an I-cord.

Work the I-cord for the desired length. The shown piece was worked for about 10 inches from the beginning. If desired, add beads now.

Once the desired length is reached, on the next row, turn and purl back. (If you were slipping the first stitch of every row, return to doing this as well.) Then:

Row 2*: Knit 2, yarn over, knit 2, turn
Row 3*: Purl 5, turn
Row 4*: Knit 2, knit 2 together, knit 1, turn
Row 5*: Bind off purl-wise

Finishing

If using crab stitch (reverse single crochet), wind in ends.

Smooth out piece so it doesn’t twist, and put beginning and end together. If sewing together, have right sides facing and use ends to sew together using tapestry needle. If using crab stitch, have wrong sides facing, and starting at one end, crab stitch around piece.

Wind in remaining ends.

Insert grommet into the hole left by the yarn over.

Slide keyring through the grommet. (This can be a bit fiddly, but once the key ring is attached, it’s not going anywhere.)


Monday, February 20, 2017

Kitty Ears

I have hit the part of the year where I have no outstanding projects, so I'm working through my backlog of odd ideas...

A few years ago, I bought some plastic headbands with foam. (Click on the link to see what I'm talking about. This is not where I bought them, though. They have since been discontinued from that retailer.) I ordered them because I hadn't quite made the minimum threshold for free shipping I thought I could come up with a knitted cover for them.

A few years later...

You know those cat ear headbands? I kinda wanted to try my hand at making something similar. So, I thought and I plotted and I knit. I even braved Kitchener stitch. And...


...I finally got a working model. (In orange, natch.)


OK. Curiosity sated.

And for me, I'm posting the pattern I used so that I won't lose it later.

Knit Headband Cover


Materials:
  • Caron Simply Soft Yarn (this project doesn't use all that much yarn--use whatever scrap yarn you've got)
  • Plastic Headband with Foam--1 1/2 inch
  • Size 7 needles
  • Scrap Yarn
  • Tapestry Needle
  • Pipe Cleaners
Gauge: 
18 sts and 26 rows/4 inches in stockinette stitch

Pattern:
Using a provisional cast on (I used the crochet chain method) cast on 66 stitches
Work 10 rows in stockinette stitch (knit right side, purl wrong side)
Unravel the provisional cast on and place live stitches on needle
(Note: instead of using needles, I placed all live stitches--from both ends--on scrap yarn.)
Graft first row to last row around the headband using Kitchener stitch
Sew ends shut, then wind in ends

Ears are made using one pipe cleaner in matching color. Cut in half. Fold each piece in half. Bend the ends at a little under half an inch. Place them evenly on the headband, sticking the pipe cleaners through the knit stitches.

If you attempt this, I would love to see how yours turns out. I'm on Twitter, Instagram, and Ravelry as @ZiziRho.

Monday, January 23, 2017

Geeky Beanie

I finished it!


Eldest nephew, whose birthday was December 26th, chose what he wanted me to knit him. He chose the background color, and he asked for the pom-pom on top.


And today, I'm going to share the "recipe".

I knit the beanie from the bottom up, using a stretchy cast-on. I worked the ribbing in the round, but then split to knit flat for the designs in the main part of the hat. I did this because the colorwork was worked using intarsia. (The X-Wing was knit all in white with the detail added later using duplicate stitch.) Once the colorwork was finished, I went back to knitting in the round for the crown, using a standard decrease to get to the top. Then I seamed together the open hole using mattress stitch. 

If the above paragraph sounded like gobbledygook, this pattern is not for you. The colorwork is a bit, ahem, involved.

(and this is the inside neatened up a bit)
I had to take a couple runs at it before I got it right. (I'm no colorwork expert, but someone with less patience and/or less experience might not make it to the end.)

This is not impossible. If you have colorwork (specifically intarsia) experience, and the italicized paragraph sounds reasonable, then you should have no problem completing this beanie.

Finished Measurements;
The circumference is about 18 inches. It's about 8 inches from brim to top.

Materials:
Caron Simply Soft yarn in black, gray, white, red, and blue
(a full skein won't be needed for any of these colors, but most yarn will be needed in the background color)
Size 7 circular (or double pointed) needles
Notions: Bobbins, Stitch Markers, Tapestry Needle

Gauge:
22 stitches=4 inches in stockinette stitch

Pattern:
Cast on 100 stitches using the Old Norwegian Cast On
(Note: it may be useful to use a size 8 needle just to cast on, just to make sure the ribbing edge of the beanie stretches fully.) Then join to work in the round, being careful not to twist stitches.

Work in k2, p2 ribbing for 2-2 1/2 inches. (I went just a touch over 2 inches.)

Then knit one round. After, divide to work flat (which is more about needle arrangement than anything else at this point.)

Set up row: make 1 stitch, k1, place marker, k30, place marker, k4, place marker, k30, place marker, k3, place marker, k30, place marker, k2, make 1 stitch
(Note: the make 1 stitches are for selvedge for seaming up this bit of the beanie later. The markers are placed to set where the colorwork charts will be worked.)

Working in stockinette stitch flat, work the charts of your choice in each of the 30 stitch panels. These charts are not mine. I found them online:
Note: the X-Wing fighter was worked as plain white:


And then the detail was added using duplicate stitch after the beanie was finished:


This beanie can be knit with any 30 stitch chart, so any 3 charts on those two pages (or any other chart) can be substituted to make the hat exactly what you want. 

After completing the colorwork, rejoin to work in the round, binding off the selvedge stitches. The beanie should be about 6 1/2 to 7 inches long at this point. If it's not quite long enough, knit even until it is. (This can be fudged a bit. Once the decreases start, the hat should measure from the top of the head to the ears.)

Decreases: 
Round 1: *k2tog, k8*, repeat all around (90 sts)
Round 2 (and all even rounds until specified): knit even
Round 3: *k2 tog, k7*, repeat all around (80 sts)
Round 5: *k2tog, k6*, repeat all around (70 sts)
Round 7: *k2tog, k5*, repeat all around (60 sts)
Round 9: *k2tog, k4*, repeat all around (50 sts)
Round 11: *k2tog, k3*, repeat all around (40 sts)
Round 13: *k2tog, k2*, repeat all around (30 sts)
Round 15: *k2tog, k1*, repeat all around (20 sts)
Round 17: k2tog, repeat all around (10 sts)
Round 18: k2tog, repeat all around (5 sts)

Break yarn. Thread through remaining stitches. Tighten. 

Wind in all ends. (To keep yourself sane, you might want to start the winding in of ends as soon as you can, like while working the beanie.) Duplicate stitch any details that may have been missed earlier. Make a pom-pom and attach to the top.

And that's it. As the colorwork charts are not mine, permission to make this for resale must be cleared by the copyright holder for those charts. 

If you do make this, I'd love to see how yours turns out. Either comment here or tag me on Instagram, Twitter, or Ravelry (I'm @ZiziRho).

Monday, December 5, 2016

Mini Wreath Pin

The other day I went rifling through my jewelry drawer for something or other, and I stumbled across a small crocheted wreath pin. Well, three of them. And it got me thinking.

Crocheted Mini Wreath Pin

At that point I didn't remember making them, but I knew they were my handiwork. I went in search of the pattern. I had to have it somewhere, right?

Well, no, I don't. Slowly, the memories returned. I do remember the initial idea behind them. (I found an old pin my great-grandmother made, and I wanted to do something similar.) I bought a couple skeins of yarn (which I still have--these pins don't take much). And I knew I still had the box of safety pins I bought for that initial batch.

I remember I gave them to everyone that particular December. How long ago? A good decade, probably. Maybe longer. (After 2001. Before 2007. I can't narrow it down any further.)

Time to reverse engineer the things. Turns out there wasn't much to them. Not surprising. I didn't write it down, so it had to be something easy enough.

And so, for me, so I have a record, I am going to put the pattern here. Because I know what I did now. And I don't want to have to figure it all out again.

Crochet Wreath Pin


Materials:
Worsted Weight Yarn (I used Lily's Sugar 'n Cream Christmas Sparkle)
Size G Hook
Safety Pin
0.23 in/6mm Bells (although a larger sized bell could work)
Sewing Thread
Tapestry Needle
Sewing Needle

Gauge:
Gauge is not critical (it'll just be a bigger or smaller wreath), but my finished piece has a 2 inch diameter.

Instructions:
Ch 5. Join with sl st to form a ring.
Round 1: Ch 3. Work 15 dc into the ring (or the number to fill out the ring--a couple dc more or less won't be a big deal). Sl st into the top of the ch st.
At the same time: Attach the safety pin by holding the non-opening side to the back of the work. Work 2-3 dc over it (while working them into the ch 5 ring). It doesn't matter where in the round this gets done, but I generally do it near the beginning.

Attach safety pin to back of work by crocheting over it

Safety pin with two double crochets worked over it

Round 2: Ch 1. Work one reverse sc into each dc around. Then cut yarn and fasten off.
Wind in ends.

Back View

Once the base is made, cut a short piece of red yarn and tie it into a bow.

Attach the bow and the bell to the wreath using sewing thread.

Crocheted Mini Wreath Pin (with quarter)

Monday, July 25, 2016

Pokeball EOS Lip Balm Holder Pattern

Over a year ago, I posted the pattern for the crocheted EOS lip balm holders. A couple months later, I made one that looked like a Pokeball. But I never got around to publishing the pattern.

Until now...


(Since everything Pokemon is big again, why not?)

This is pretty much like the EOS lip balm holder, except for one major alteration. Every time there's a color change, I bind off. This minimizes color jogs.

The preliminaries are the same as before...

This holder is crocheted using Caron Simply Soft Yarn (in white, red, and black) on a size G hook. The other things you'll need are a lobster claw clasp (big enough to fit over the yarn), a tapestry needle, a 5/8 inch white button, and a stitch marker. I'm not sure how much yarn this takes to make, but it isn't much at all. Color is important, so hopefully you already have the right kind of white, red, and black yarn on hand.

I'm using the usual abbreviations--sc=single crochet; sl st=slip stitch; ch=chain

Gauge: 17 sc and 18 rows over 4 inches
This is one of those projects that is so small that making a gauge swatch is kind of silly. What I suggest is that you keep an EOS Egg Lip Balm on hand and plop it in at about round 6. If it won't fit, add a stitch to the first round. If it's very loose (there should be a little ease, but not so much that it'll fall out), subtract a stitch from the first round.  

This is worked in a spiral, so make sure to mark the beginning of each round as you pass it. It's very easy to lose track if you don't mark it. (Not that I have any experience with that...)

The pattern:


Using the white yarn: ch 3. Sl st into the first chain, making a loop.
Round 1: Work 9 sc into the ch 3 loop.
Round 2: 2 sc in each sc from previous round (18 sc)
Round 3: *2 sc in 1st sc, sc in next sc*, repeat these 3 sc all the way around (27 sc)
Rounds 4 & 5: Continue working one sc into each sc (27 sc)

At the end of the round, cut yarn. Draw the yarn all the way through the loop. Then put that yarn on the tapestry needle, and loop the yarn around the base of the next sc and up and through the top of the final sc. If you've never done this before, here's a great video I found showing exactly what I'm talking about:


And what you have will end up like... 


Round 6: Using black yarn, pull up a loop anywhere on the holder. Ch 1. Then work a sc into each white sc (27 sc). At the end of the round, cut yarn and finish exactly like before... 


Round 7: Using red yarn, pull up a loop anywhere on the holder. Ch 1. Then work a sc into each black sc (27 sc)
Round 8: Continue working one sc into each sc (27 sc)
Round 9*(also see note below): *Sc into each of the next 7 sc, sc 2 together*, repeat 2 more times (24 sc)
Round 10: *Sc into each of the next 6 sc, sc 2 together*, repeat 2 more times (21 sc)

*On round 9, you'll also be attaching the claw clasp. It doesn't matter which stitch you attach it to (I usually attach it to the 4th stitch). Where you want to attach it, remove the hook from the piece, pull the loop out, slide the clasp (open part facing towards the piece) over the stitch, replace the hook, and continue crocheting. On the next round you'll need to push the clasp out of the way to work a stitch into that stitch, but then it's completely secure.


Finishing: Wind in ends. (If you crochet over the ends from the previous color, you can minimize how many ends to weave in at the end.)

Take the white button and a black permanent ink marker. Color the edge of the button. (If you can find an easier way of doing this, please let me know. This is the simplest way I've found to do this part.) Then, using the white yarn, attach the button somewhere on the black stripe.


This is a little more complex than the plain color EOS lip balm holders, but it's worth it for the wow factor. I'd love to know how yours turns out (if you plan to make one). You can comment here or tag me on Ravelry. (I'm ZiziRho, and I'll put up a pattern page for this soon.)